AWS Marketplace Launch
Launching CloudyCluster in the AWS Marketplace uses a built-in CloudFormation Template. This process will create a new IAM Role and Policy and Launch the Initial Control Instance.
Follow the instructions as outlined:
-
In the AWS Marketplace First enable the free CentOS base AMI here then navigate and enable CloudyCluster on CentOS in the AWS Marketplace here.
-
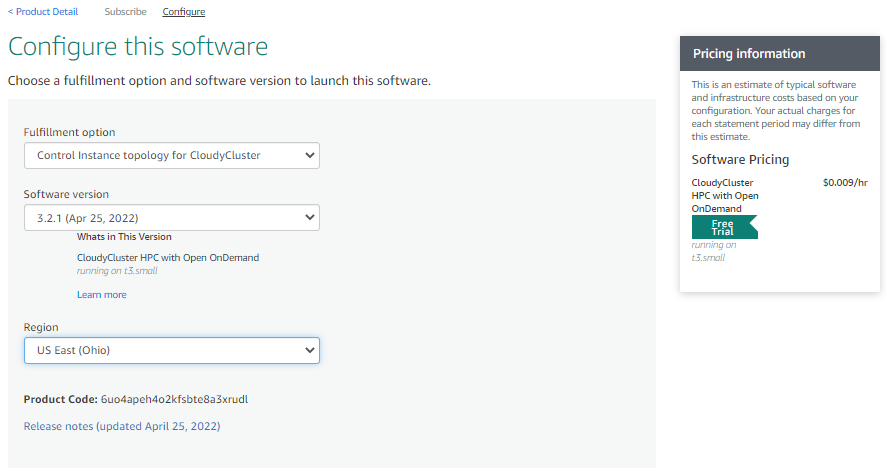
To enable CloudyCluster in the AWS Marketplace, select “Continue to Subscribe”

- Select a CloudyCluster version (the newest version is recommended), a region, and ensure the “Control Instance topology for CloudyCluster” radio button is selected before launching with the CloudFormation console.
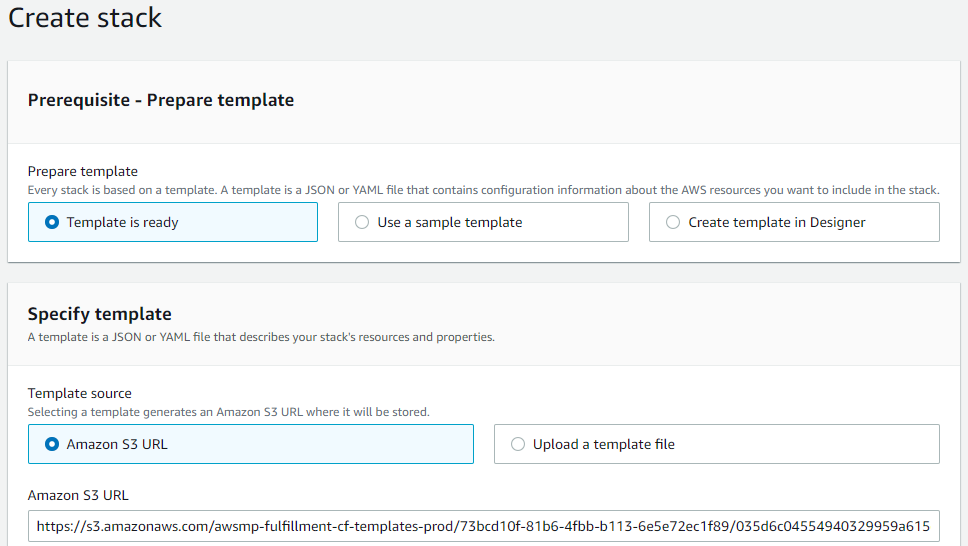
- Use the default template settings.
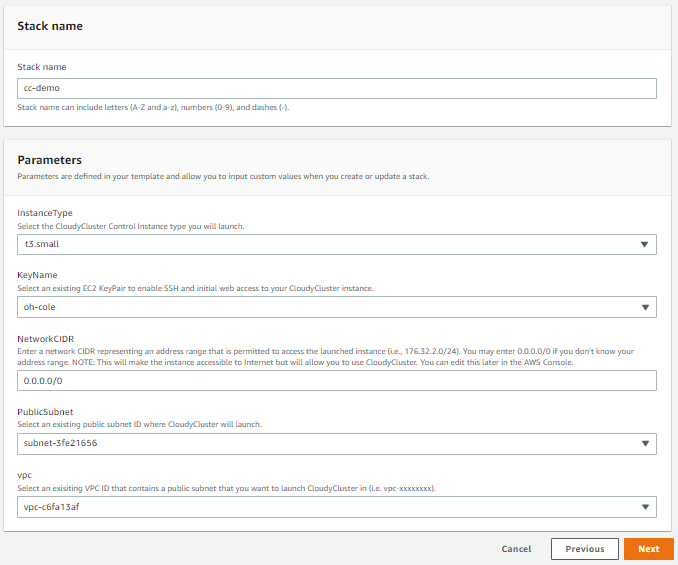
- Assign a name to your stack and fill in the parameters. Make sure the PublicSubnet and VPC are in the same range.
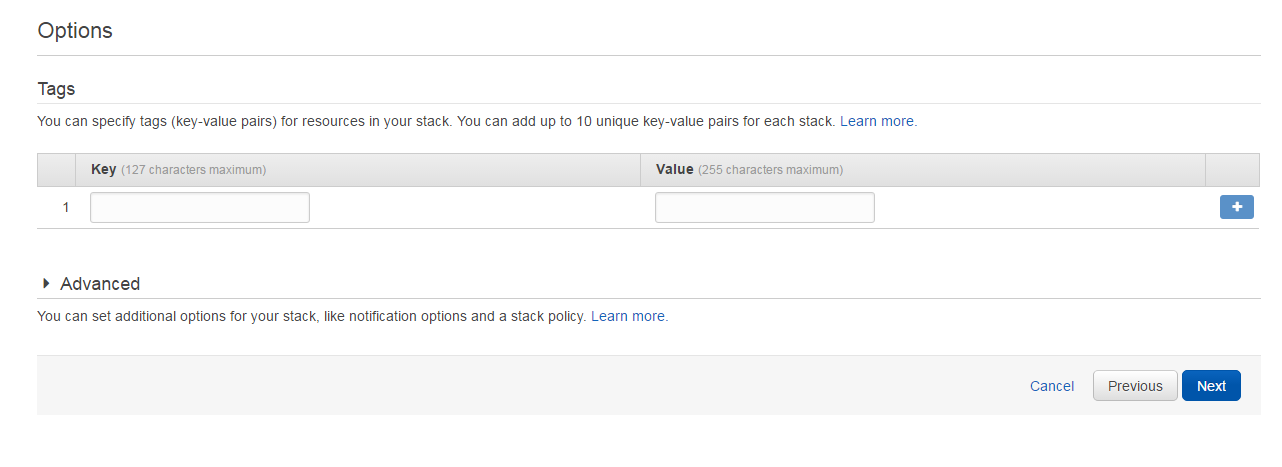
- Assign Key/Value pairs if desired.
- Review your settings and select the “Create” button to create your stack. This will launch the CloudyCluster Control Instance and authorize your AWS account to be charged for the single control instance. You will be able to review additional charge estimates before you launch additional HPC instances.
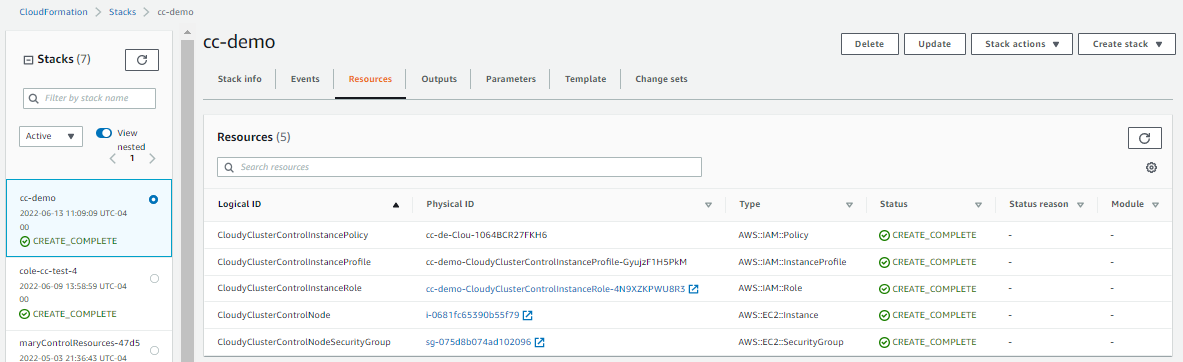
- To access the CloudyCluster control instance that was launched, select the “Resources” tab in the CloudFormation Console and copy the select the VM instance.
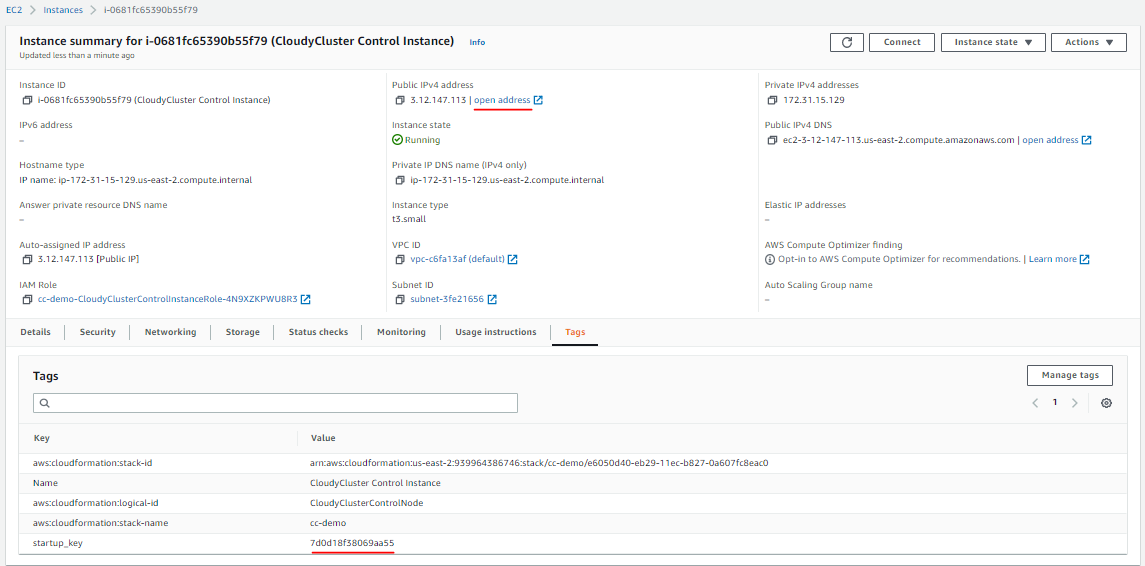
- Paste the “Public IPv4 address” into a web browser, and wait about 5-10 min for the instance to fully launch. Then, use the startup_key in the instance tags to sign into CloudyCluster for the first time.