HPC Environment Quick Start Setup
Quick Start Environment Setup
The Quick Start Cluster Setup options allow you to select from several preconfigured environments. These include the following configurations:
Quick Start Configuration Option 1: 1 Job-Scaling Scheduler and Compute Group with CCQ, Amazon Elastic File System - EFS, 1 Login Instance, 1 Scheduler, and 1 NAT Instance
Quick Start Configuration Option 2: 1 Job-Scaling Scheduler and Compute Group with CCQ, 4 OrangeFS File System Instances, 1 Standby, 1 Login Instance, 1 Scheduler, and 1 NAT Instance
Quick Start Configuration Option 3: 4 Fixed Compute Instances in 1 Compute Group, Amazon Elastic File System - EFS, 1 Login Instance, 1 Scheduler, and 1 NAT Instance
Quick Start Configuration Option 4: 4 Fixed Compute Instances in 1 Compute Group, 4 OrangeFS File System Instances, 1 Standby, 1 Login Instance, 1 Scheduler, and 1 NAT Instance
Quick Start Configuration Option 5: 8 Fixed Compute Instances in 1 Compute Group, 4 OrangeFS File System Instances, 1 Standby, 1 Login Instance, 1 Scheduler, and 1 NAT Instance
role="alert"> The available Quick Start Configuration options vary according to your selected Environment Region, due to variations in AWS instance limits by AWS environment region.
Procedure
Follow the steps below to create a Quick Start Environment:
- On the Environment Overview main screen, click the “+” button at the top left to create a new environment.
- Use the pulldown menu to select options for Instance SSH Key, Environment Availability Zone and CloudyCluster Version. The newest version of CloudyCluster is always recommended.
- Enter a Name for your Environment. Environment names must be alphanumeric, between 3 and 30 characters long, and may not contain spaces or special characters.

- Select the Quick Start link at the bottom of the screen.
- Select the radio button for one of the pre-configured setup options.
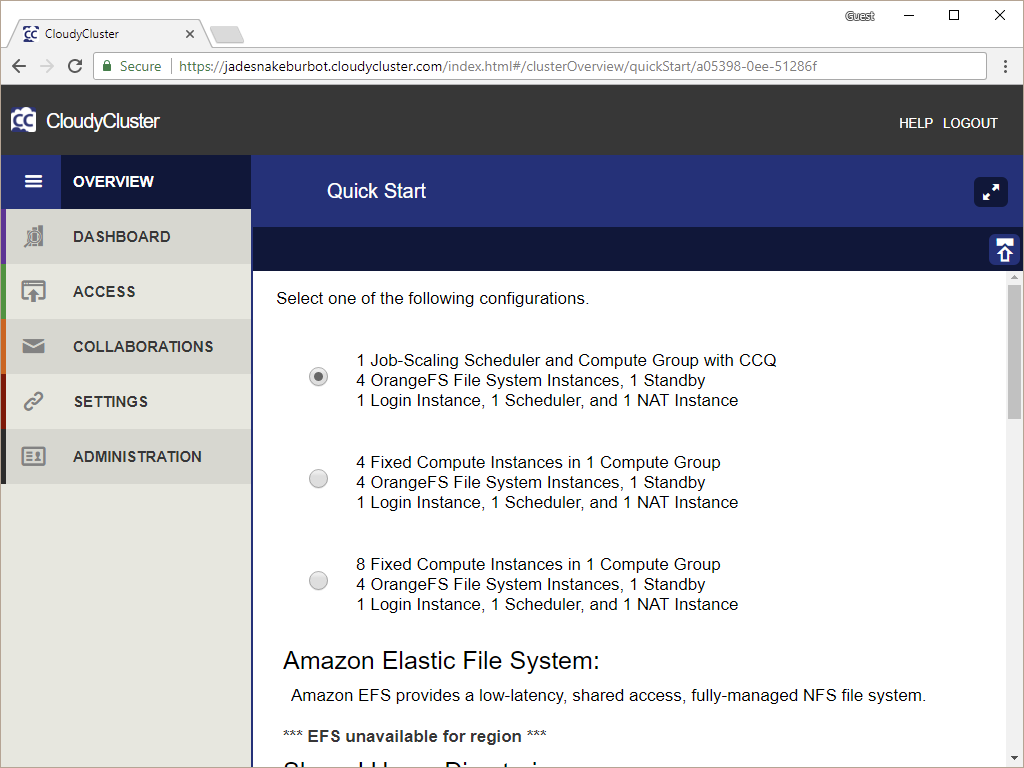
role="alert">The options displayed on this screen may vary according to your selected Environment Region, due to variations in AWS instance limits by AWS environment region.
- If you want to use Amazon Elastic Filesystem, select the Enable EFS check box.
role="alert">The Amazon EFS is not available in all regions. If it is unavailable for your selected region, you will see the notice “EFS Unavailable for region” instead of this option.
- If you want to enable shared software, check the Enable SSW box and accept the default name or assign a name.
- If you want to use an Amazon S3 Bucket for additional data storage locations, select the Enable S3 check box and enter a name for the S3 bucket to be created. S3 Bucket names must start with a letter and be between 3 and 24 characters long and contain only lowercase letters, numbers, and periods.
- If you want to use S3 encryption, select the Enforce S3 Object Encryption check box.
- Assign a Scheduler Name and select a Scheduler Instance Type and Scheduler Type.
- Select a Compute Instance Type, or accept the default.
role="alert">If you selected a Job Scaling Scheduler and Compute Group with CCQ, your Compute Instance Type must be “Dynamic” and you cannot select another option.
- Enter your file system Name and Mountpoint or accept the default.
- Select your storage Instance Type or accept the default.
- Enter your total Parallel Storage size in gigabytes. This storage space will be divided among your file system instances.
- Select the Enable EBS Encryption check box if you want this level of encryption. (See AWS documentation for details.)
- Enter a Login Instance Name and Instance Type.
- Click the Next arrow button to proceed.

- The Final Review screen will display. You will see a summary of all instances to be created, with a cost per hour for each type and a total cost per hour for your HPC environment (not including charges for network egress).

- Enter a network CIDR representing an IP address range that is permitted to access your environment.
role="alert">You may enter “0.0.0.0/0” here if you do not know your address range. This will make the environment accessible to the Internet. Private IP addresses (i.e., 192.x.x.x/x or 10.x.x.x/x) are not valid CIDRs. You can also change this later in the AWS console.
- After you have carefully reviewed your environment configuration, click the Create Environment button to start spinning up your HPC environment. At this point you will start being charged for the instances that comprise the Environment.
